
Windows 11 allows users to connect multiple display devices to the same computer. From the looks of it, the process looks simple as you only have to connect these display devices but in fact, it requires a lot more than that. Connecting these display devices is the easy part of the process because you have to manually configure these devices before you can use them.
Windows 11 features various configuration options to enable users to get the most out of multiple display devices. If this is your first time using multiple display devices and don’t know what to do except for plugging in the connection cables, we have got your back. With this guide, you will be able to configure screens according to your needs and get the most out of this setup.
How to connect multiple displays?
To connect multiple monitors to your computer, you have to find the right cables according to the ports. The type of connection cable that you choose depends on these ports. Each laptop and desktop feature different ports so identifying these ports is very important. Digital Visual Interface or DVI cable and high-definition multimedia interface or HDMI cables are the most common types of display cables.
To find out which ports are available on your laptop and desktop, check the sides, back, and front. HDMI is a very common type of connection cable that transfer audio and video information from the desktop to the display device. The HDMI port is found on most computers and you can use it to connect the computer with more than one display device at the same time.
The DVI cable is similar to the HDMI cable but it can transfer visual information to the display device only. If you connect your computer to a monitor using a DVI cable, you will have to connect another cable to transfer audio data. Most computers feature both DVI and HDMI cables but if one type of connector is available, just purchase a connector to change a DVI port to an HDMI port or vice versa.
How to access Windows 11’s display settings?
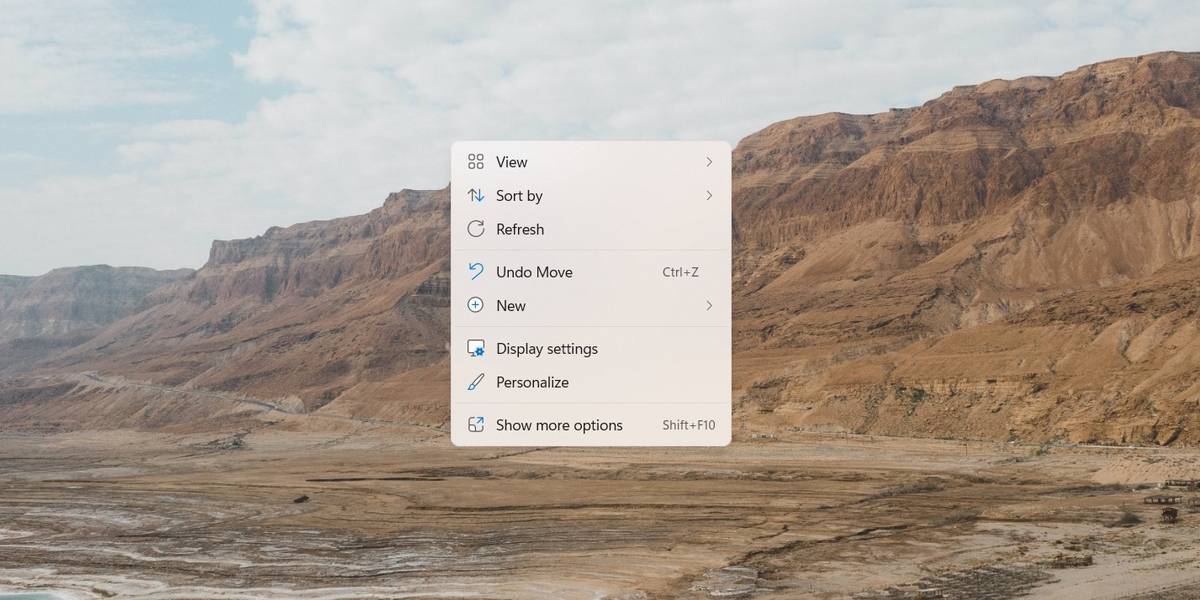
Now that you have connected all the monitors that you want with your desktop or laptop, it is time to configure them. To configure these monitors, you have to access display settings in Windows 11. Just like the previous Windows operating systems, you can right-click on the desktop to access the display settings in Windows 11. You can adjust everything from the brightness to the color scheme and the screen resolution of all the available monitors from the display settings. You will get the multiple display section in display settings only when multiple display devices are connected.
How to configure multiple display devices?
Now that you are in the display settings in Windows 11, you can manage all the available monitors here. The first section shows all the available monitors with numerals to indicate which is the primary monitor. To activate a monitor, just click on it. Now you can change the display settings of that specific monitor only.
Select the Primary Monitor
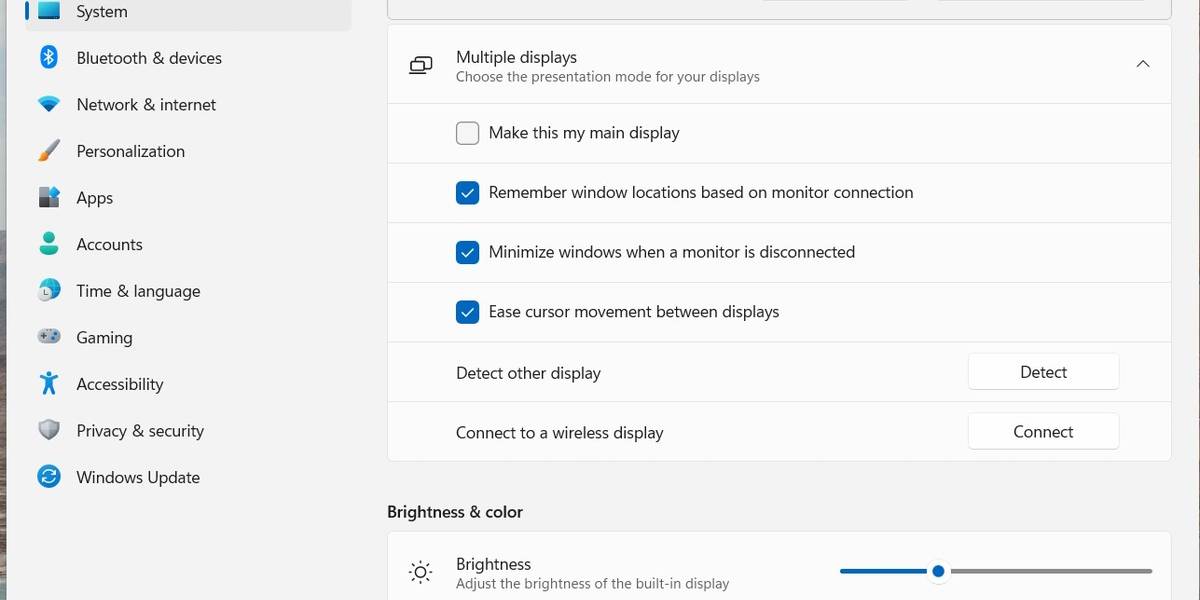
First and foremost, you have to select the primary monitor for your setup. Choose the primary monitor carefully as all the other available display devices will be positioned according to the primary monitor. To set the primary monitor, just select a monitor from the available options and check the first box that states “Make this my main display.”
Read More: 5 Ways to Fix Blue Screen and Stop Errors in Windows 10
Configure locations of other displays
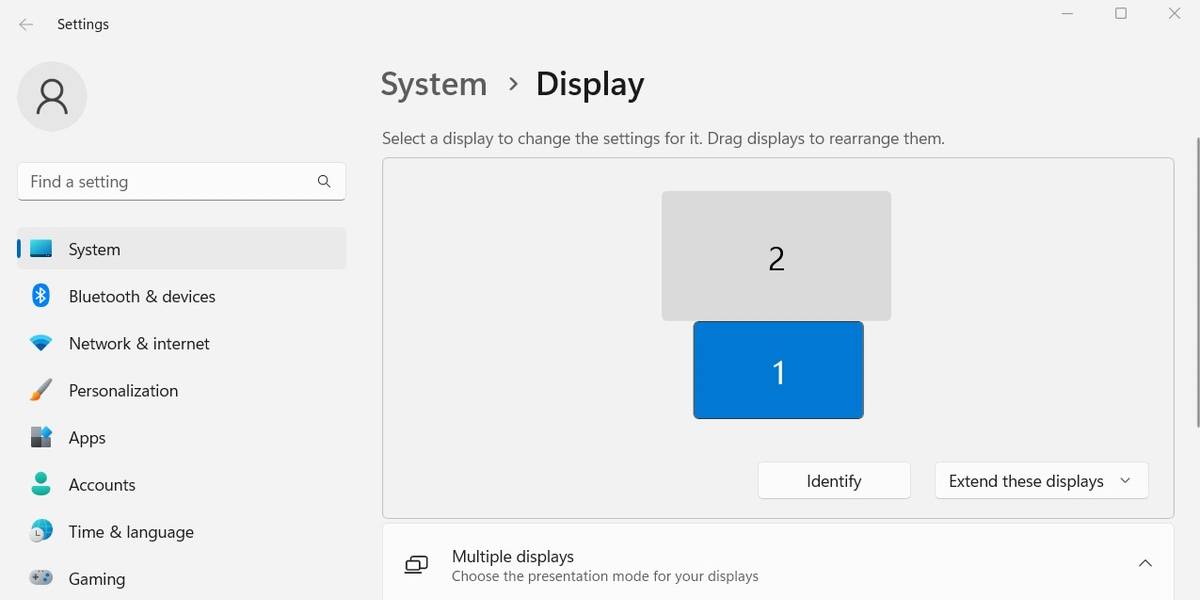
After you choose the primary display, all the other displays will be secondary displays and you can configure their location in the next step. The position of the primary display will act as the center point for these displays. You can drag and drop display boxes from the display settings to arrange monitors according to your needs. Although, all the available monitors are indicated by numbers, if you are still unsure about their exact location.
You can use the identify button to get the position of each monitor. When you press this identify button, an indication will appear on that specific monitor. To make sure that the mouse works smoothly on all the available monitors, you should arrange the displays close to each other in the display settings menu. Also, make sure that they are positioned in the settings just like how they are positioned in the real.
Extend or mirror displays
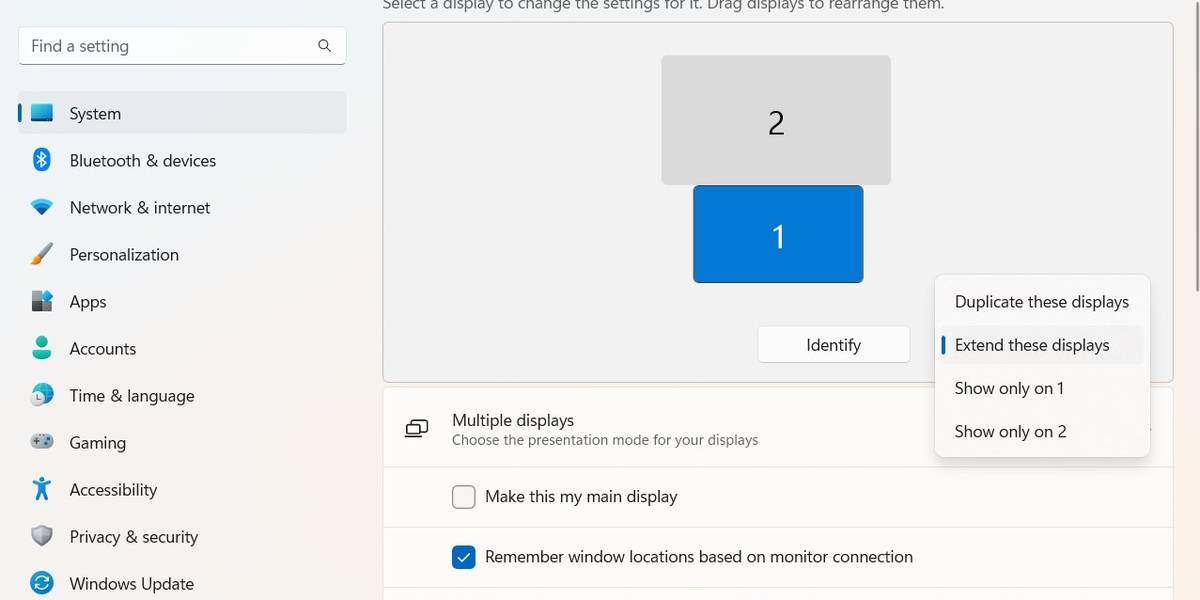
In Windows 11, the display settings section also features a separate menu from where you can extend the display or duplicate them. With the extend option, you can make multiple displays act as one continuous display. The mirror or the duplicate feature will show you the content of the primary display on the current monitor.
Read More: How to Fix Security Certificate Errors?
Adjust Screen Orientations
If you have a desktop monitor and a tower monitor, you can change the orientation of the screen from the display settings to get the perfect view. From this menu, you can even rotate the screen by up to ninety degrees.
Choose the monitor size
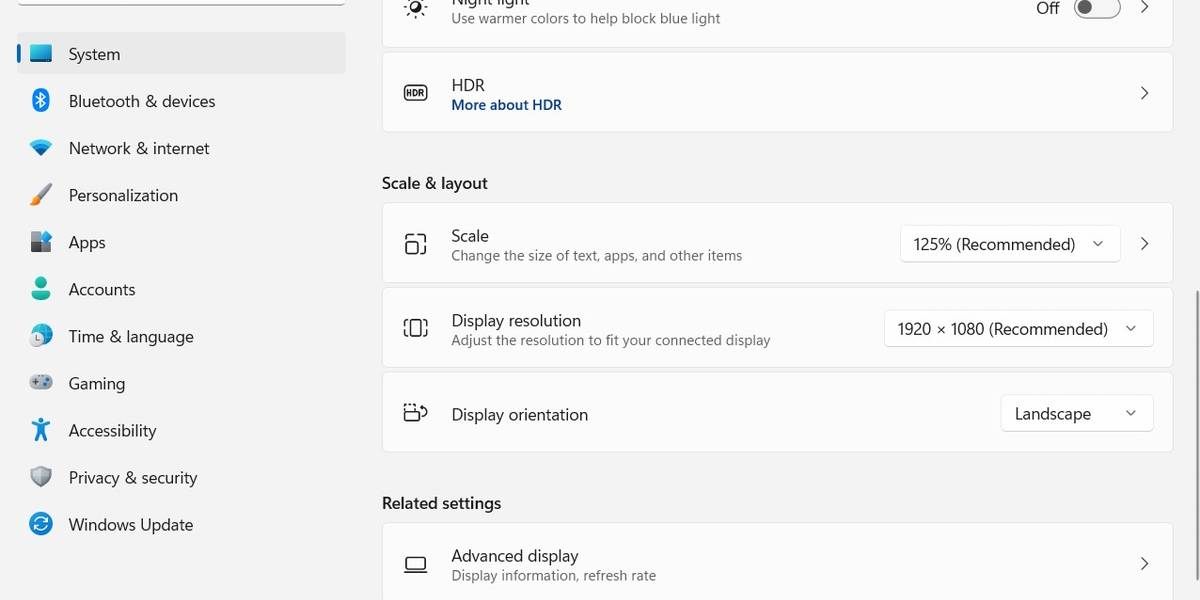
Although, a large number of monitors available these days are good at communicating with the computer so the resolution and the screen size are automatically adjusted. In case, you get a glitch in this regard, you can change the monitor size from the display settings. When settings are selected automatically, the display device will work the best because manual selection can be inaccurate.
The automatic detection may not work for multiple devices accurately. To avoid such situations, you can change some display settings. Change the resolution of the selected display from the Scale & Layout section in the display settings. When you change scale and layout settings for a single monitor, all the other monitors will stay unaffected.