

Text editors are the best option if you want to save notes, codes, and other confidential data. They are very popular among computer users due to their simple interface and less usage of system resources. There is just one problem, anyone can access them without proper encryption. When we think of encryption, the first thing that comes to our minds is password protection.
Adding a password to a text file in Windows 10 and Windows 11 isn’t easy because the text app doesn’t feature password protection by default. Instead, you will have to use third-party apps to encrypt text files with passwords. After reading this guide, you will learn about all the apps that you can use to add passwords to text files in Windows 11 and Windows 10.
Methods to Add Passwords to Text Files
Here are the four methods through which you can add passwords to text files. These methods will enable you to add passwords to Notepad files, Word files, PDF files, and PowerPoint files.
1. Encrypt with 7-Zip
Although 7-Zip is an alternative to WinRAR, it also comes up with many other great features such as encryption. It uses AES-256-bit encryption technology to protect text files in Windows 11/10. The best thing about encrypting files with 7-Zip is that even if you send files to other computers, you will have to enter passwords to access them. 7-Zip is an open-source archive solution that features cross-platform encryption. To encrypt files with 7-Zip, follow these steps.
- Download and Install 7-Zip
- Right-click on the file and Choose “Show more options”
- Find 7-Zip and Click on it
- Select “Add to archive”
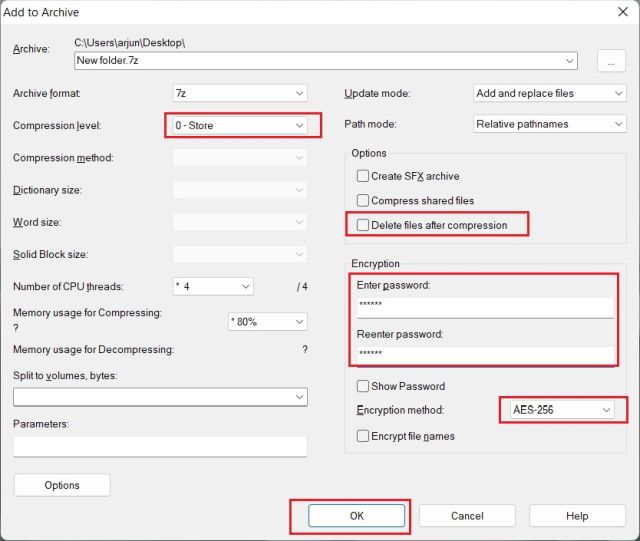
This will open a 7-Zip window for the compression of files.
- In this window, Select Store compression level
- Go to the Encryption section and Enter the password
- Select the desired Encryption method
- Click “Ok” to Apply
This will create an encrypted zip file in the same folder. Now, whenever you try to open this file, you will have to enter a password. For better protection, just hide files from the Windows 11/10 folder properties section.
2. Encrypt with OneDrive
One of the biggest benefits of encrypting your text files with OneDrive is that it offers password protection for local files as well as cloud files. Although OneDrive is a paid app, you can still encrypt your files with the free version. OneDrive features a personal vault where you can store text and other files.
Read More: 6 Simple Time Management and Productivity Apps for Windows
The free version also features the personal vault but you can store a maximum of three files in this vault at a time. It is a very secure vault where you have to enter a new code every time to access files. This code will be sent to your email. All the files in the locker are never cached so there is no way to access them. To encrypt text files using OneDrive, follow these steps.
- Download and Install OneDrive
- Go to Taskbar and Click on the OneDrive icon
- Choose the “Unlock personal vault” option
- Set up the personal vault
Once you have created the personal vault, you have to add files to it.
- Go to the OneDrive folder
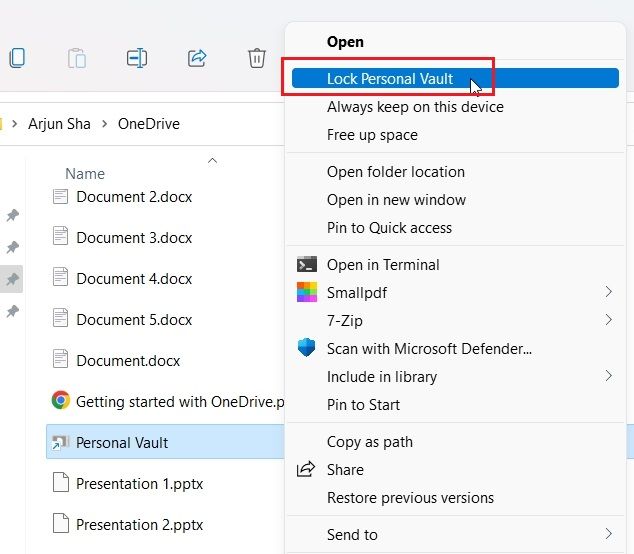
- Open Personal Vault
- Enter the 2-factor code to access the vault
- Select files and folders to add them to the personal vault
- After you have added files, click on the “lock” option to lock the vault
In case, you forget to lock the vault, don’t worry as it will be automatically locked after twenty minutes of inactivity.
3. Encrypt with Microsoft Office
You can encrypt Word files using built-in features of Microsoft Office. Office features encryption for Word, PowerPoint, and Excel files. The best thing about encrypting with Office is that you don’t need any third-party encryption tool to do so. Here are the guidelines to set a password for your text files using Microsoft Office.
- Open Word
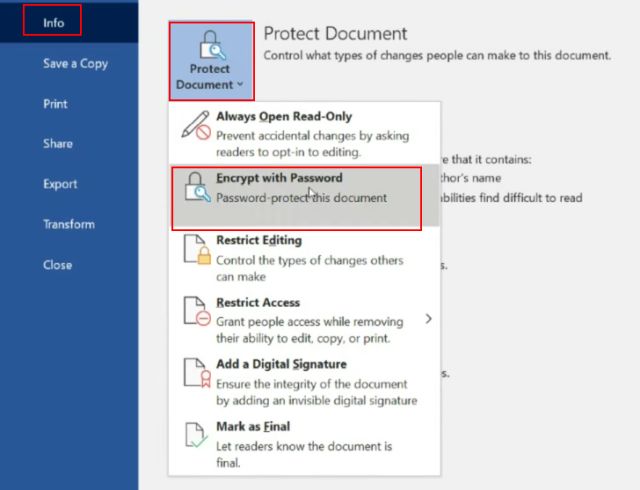
- From the top, click on the File option
- Go to the Info section
- Choose Protect document
- Select Encrypt with Password
- Enter your password and Click ok to save changes
4. Encrypt with BitLocker
Windows 11 and Windows 10 also comes up with BitLocker which encrypts files to help users in staying safe from data theft. The only downside of using BitLocker is that it supports the encryption of complete drives and partitions instead of separate files. This can be difficult for many users as they have to enter a password to access the drive. Anyways, here is how you can encrypt with BitLocker.
- Go to the Start menu
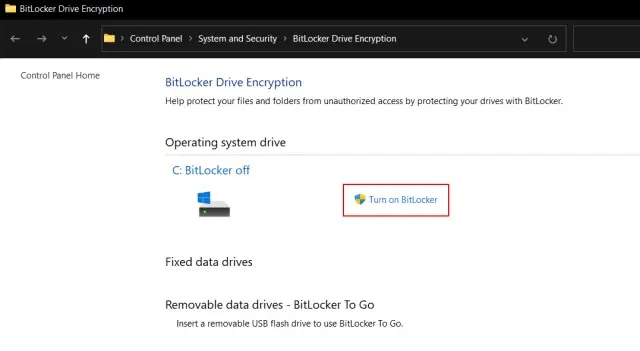
- Type BitLocker and Click on “Manage BitLocker”
- In the Control Panel, click on “Turn on BitLocker”
At this step, BitLocker will ask you to save a recovery key to recover the drive-in case you forget the password. You have options to save the recovery key in your Microsoft account, USB, and file as well as you can also print the recovery key and keep it safe. Once the recovery key is saved, restart the computer. When the computer boots up again, the process to encrypt the hard drive will start. To disable Bit Locker encryption, you have to go to the control panel again.
How to Encrypt PDF Files?
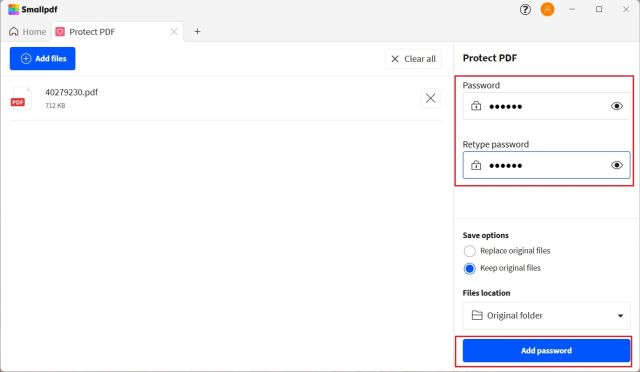
To encrypt any PDF file, you want in Windows 10 and Windows 11, you have to use a third-party tool. Here are the steps to use Smallpdf to encrypt files.
- Download and install Smallpdf
- From the side panel, click on “protect pdf”
- Select the desired pdf file and add it to Smallpdf
- Enter the password and select the file location to save it