
On the official Windows support forum, you will find many cases where users encounter an error message stating, “This Installation Package Could not be Opened” when they try to run the setup files of a program. This is a common error, and the error message doesn’t contain information about why this error occurred or how you can get rid of it. But don’t worry, as this article features the best methods to solve it for both Windows 10 and Windows 11 operating systems.
What is an Installation Package?
As the name says, an installation package has got all the information that the system needs in order to install or uninstall software. The package is also required for the perfect execution of the software when users try to run it.
Why does an Installation Package Error Occur?
Before moving to the guide to solving the installation error, it is important to learn about why this error occurs. Here are some of the leading causes of the installation package error.
- Incorrect package – As you know that systems are 32-bit and 64-bit; sometimes, users download a 32-bit installation package and try to install it on a 64-bit system or vice versa. This will lead to the installation package error. To avoid it, make sure to download the correct package according to your system.
- Outdated installer – Sometimes, the installation package is corrupted or outdated, and you won’t be able to install it properly.
- Outdated operating system – If the operating system is outdated, this can lead to many issues, such as the installation package error.
- Installation Requirements – If your system doesn’t meet the minimum requirements of the installation package, it won’t run correctly.
- Permissions – If the current user doesn’t have full access to the installation folder, this will result in an installation package error. Permission is required, especially when you want to install an app.
Read More: Useful Tips and Tricks to Optimized Your PC for Gaming
Methods to fix the “This Installation Package Could not be Opened” Error
The solution to the installation package error depends on why the error occurred on your system in the first place. Because the error message doesn’t indicate that, the best option is to simply try all the methods and see which one works for you.
1. Download the Package Again
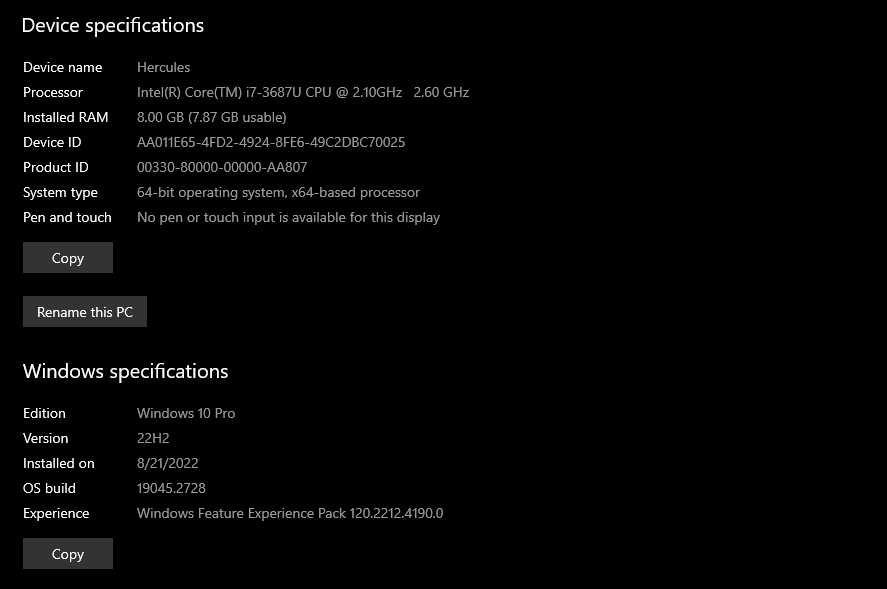
The installation package that you have downloaded may be incompatible with your system, and the error message is shown. So, just go to the official website and download the correct package according to the system version. First, select the correct operating system and then the correct operating system version. Make sure to check the type of your system before downloading the file. Here are the steps to learn the system type.
- Go to Windows Settings
- Click on System
- Go to the About section
- Find System type from Device Specifications
2. Unblock the File
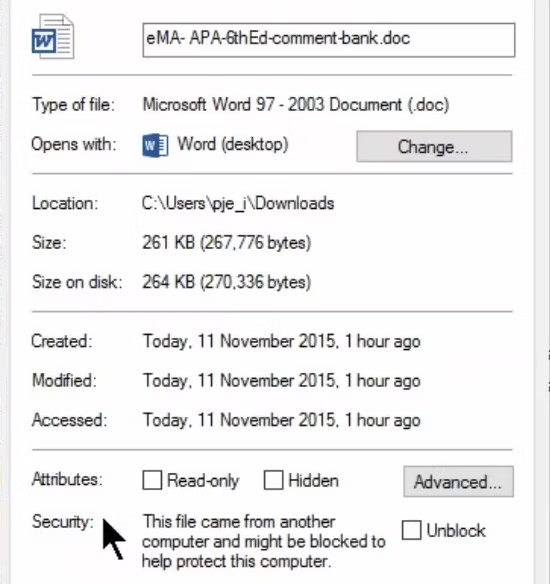
Windows has a built-in security system, and this system automatically blocks files if they are suspicious. Maybe, the installation package is blocked by your operating system, although it isn’t suspicious. You should check the properties of the file and unblock it by following these steps.
Read More: How to Restore Missing Windows Services?
- Find installation package
- Right-click to open Properties
- Go to the Security section at the bottom
- Uncheck the “Block” box and apply the settings
3. Disable Antivirus
This step is for both the built-in Windows Defender as well as third-party antiviruses because they can block the installation if the file is suspicious according to their systems. Disabling the antivirus while you are installing the file becomes more important, especially when you have downloaded the software from a pirate site. The steps for disabling the antivirus changes from one app to the other. Don’t forget to enable the antivirus again after the installation finishes to avoid putting your system at risk of viruses and malware.
4. Edit Registry File
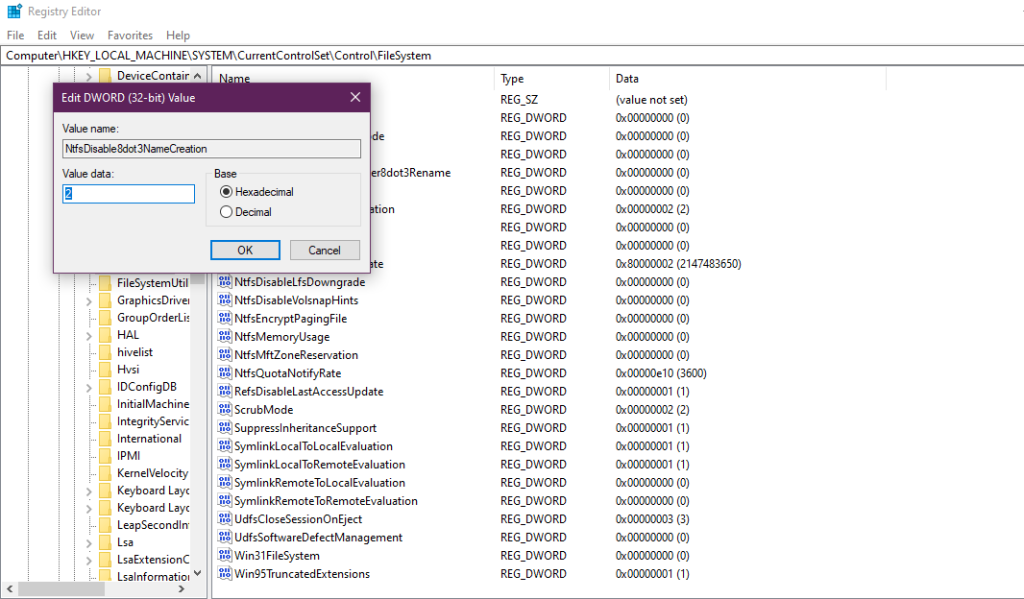
One of the most trusted methods to deal with the installation package error is editing some registry files in the registry editor. Although this method works most of the time, backup the registry files before editing them, as one wrong click can make things worse. All the steps to edit registry files are given below.
- Go to Registry editor
- Go to HKEY_LOCAL_MACHINE
- Go to System
- Go to the Current control set
- Go to Control
- Go to File System
- Find “NtfsDisable8dot3NameCreation” from the list
- Check the data value of the selected key
- Set the Data value to Zero and apply changes
- Find “Win31FileSystem”
- Change the data value of the select key to zero and save changes
5. Check the System Files
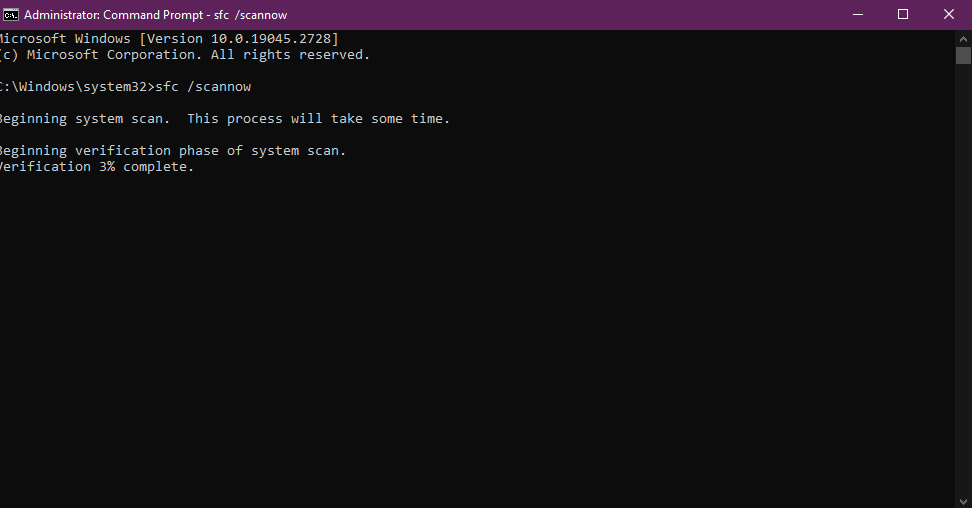
Although this isn’t pretty common, there are chances that the installation package error may have occurred due to corruption in system files. So, checking the system files for corruption and getting rid of the corruption should be on this list. To scan the system files for corruption, you need to enter a simple command in the command prompt. Open the command prompt and enter “sfc /scannow,” and let the scan run. This scan will automatically repair corrupted system files.
6. Check the Installer Service
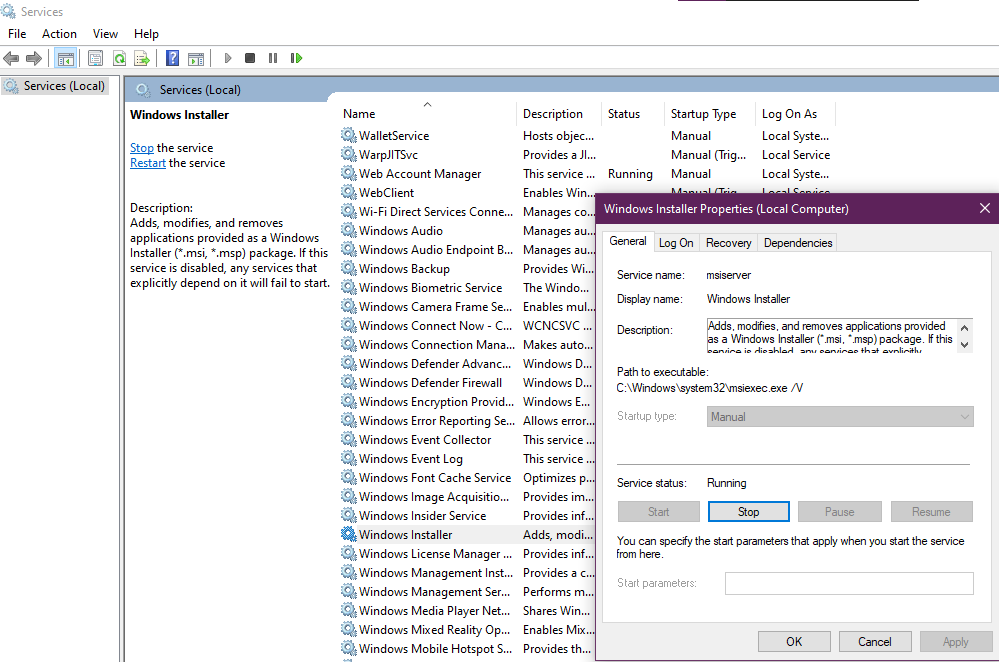
The operating system uses an installer to install all the applications, and it won’t work correctly if the installer service has stopped working. All the programs with MSP and MSI packages need this installer service. Here are the steps to check and start the installer service and get rid of the installation package error.
- Open Services app.
- Find Windows Installer and open it.
- Go to the “Service Status” section.
- Click on “Start”.
- Click Ok.
7. Update Windows
If the operating system is outdated, the Windows installer won’t work as it should. You should enable the automatic update option so the system automatically checks for new updates in the operating system and notifies you. If you find a new update, install it and try installing the app again.
8. Create a New Administrator Account
You can create a hidden administrator account through the command prompt and use it to install the problematic app. Here are the steps to create the account.
- Open Admin command prompt.
- Enter “net user administrator /active: yes.”
- Close command prompt.
Read More: How to Solve DirectX isn’t Installing Issue in Windows 10?
This will enable the administrator privileges for your current user account, and you can install the package without getting the error message.
9. Register the Installer Service
Sometimes, restarting the installer service isn’t enough when it comes to dealing with the package error. You may have to re-register the installer service. Here are the steps to first unregister and then re-register the service.
- Open the admin command prompt.
- Type “msiexec /unregister” to unregister the installer service.
- Type “msiexec /regserver” to register the installer service.
10. Restart the Computer
After trying all these methods to solve the installation package error, restart the computer so everything is adopted by the operating system. Even after trying all these methods, if the package error is still there, you may have to find an alternative to the program or download it from some other source.