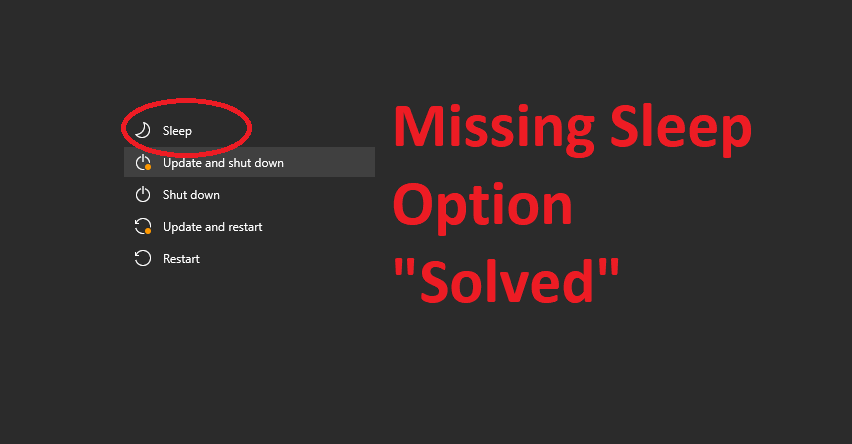
Sleep option has been available in all the Windows operating systems and is a great alternative when you want to partially shut down your system. It stops all the functions and helps users in saving their laptop battery. Many Windows 10 users have experienced an error where the Sleep option is missing in their operating system. Well, this is an alarming situation because it is a part of the start menu. But don’t worry, as here are some methods to troubleshoot and get the sleep option back.
What is Sleep mode?
Windows offers a hibernation mode and a sleep mode which are pretty similar to each other. At the same time, the hibernation mode is more power efficient because it saves information about everything from all the opened files and folders to running programs into the hardware and turns off the computer. But a computer in hibernation mode will take more time to restart.
In comparison, the sleep mode saves all the information about opened folders and running apps in the RAM, and only free components are turned off. Although this mode saves, less power but a computer in sleep mode will wake up quickly. So, the sleep mode in Windows 10 is a short-term solution.
Why is the Sleep option missing?
As you know that the sleep option is much needed, and you will have to find the root cause if it is missing. Below are some reasons why the sleep option is missing from your system so you can get it back.
Read More: How to Fix the Steam Disk Write Error on Windows 10?
- Outdated display drivers can disappear the sleep mode.
- An administrator or a user has disabled it.
- Viruses and malware can lead to this error, so don’t download apps from third-party sites and use any antivirus to scan for them.
- The graphics card in your computer doesn’t support sleep mode. So, search for the right graphics card when building or buying a computer to get the sleep mode.
- Some other component in your computer doesn’t support the sleep mode.
How to get the Sleep option back?
If you know what the reason behind the missing sleep option on your Windows 10 computer is, you can troubleshoot in a minute. On the other hand, if you are unaware of the reason, try these easy fixes to get the sleep option back.
1. Enable from the Control panel

If you can’t find the sleep option from the power menu, don’t worry, as you can manually enable this mode from the control panel. Follow these steps to get the sleep option back.
- Go to the control panel
- Click System and Security
- Click on Power Options
- From the Side panel, click on “Choose what the power buttons do.”
- Click on the first option to change settings that are currently unavailable
- Click on the Sleep box and save changes to enable the Sleep mode
In case the sleep option isn’t available in the control panel, don’t worry and use the next method.
2. Enable it using the Command prompt

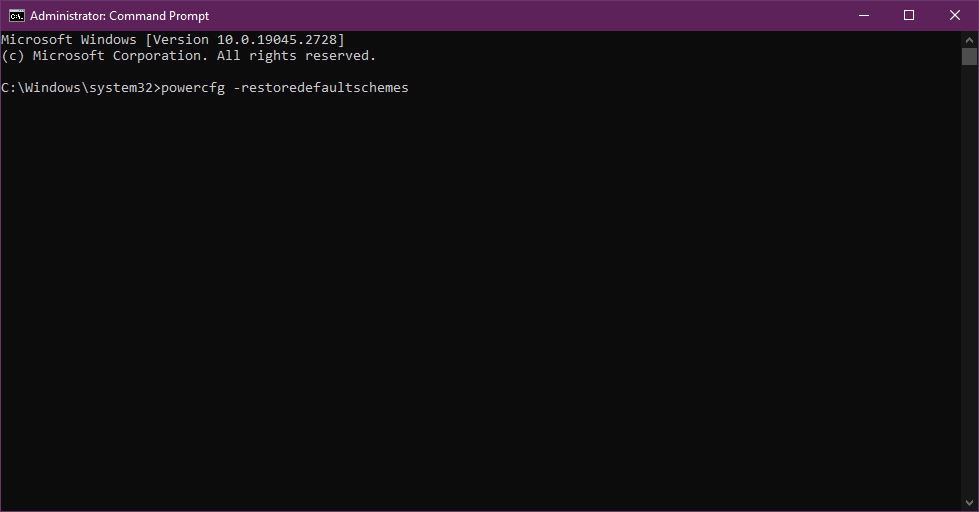
Any misconfiguration in the power scheme of Windows 10 will lead to the missing sleep option. To reconfigure the power scheme, you have to enter a simple command on the command prompt. This will set the power scheme back to default, and the sleep option will appear back in the power menu.
Read More: How to Fix Cloudflare’s Error 1020: Access Denied
- Open Command prompt as administrator
- Enter the “powercfg -restoredefaultschemes” command
- Let the process finish and close the command prompt
3. Enable it from the group policy editor

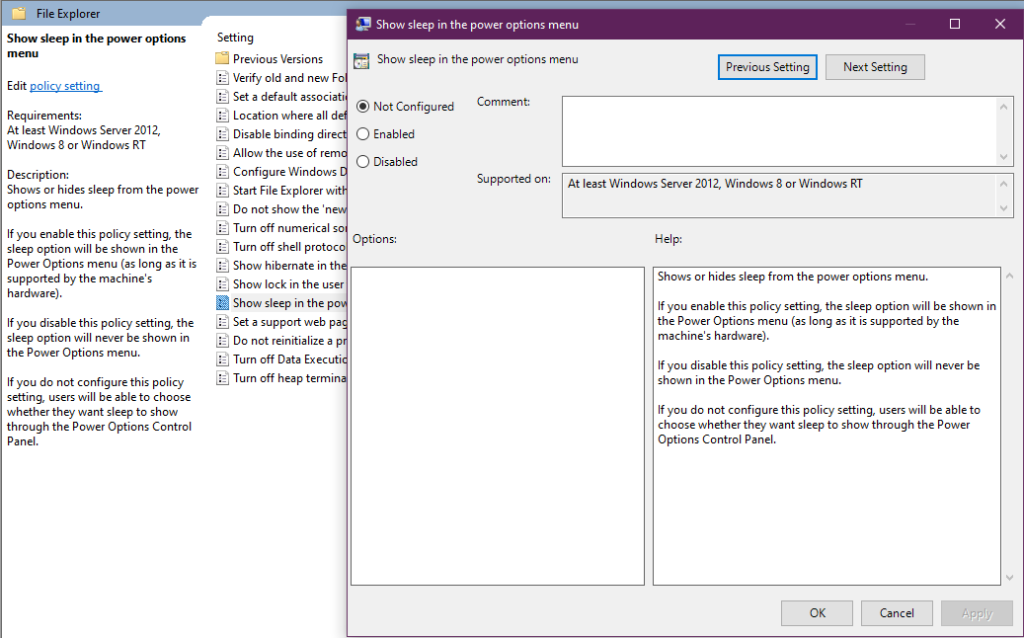
You can activate the sleep mode from the built-in group policy editor in Windows 10. The group policy editor is available only in the Pro and the Enterprise version of Windows 10. If you are using the above-mentioned version, follow these steps to get the missing sleep mode back.
- Open Group policy editor
- Open the computer configuration menu
- Open administrative templates
- Open Windows components
- Open the File Explorer
- Look for the “Show sleep in the power options” policy and double-click on it
- Choose not configured or enabled according to your needs
- Apply the settings
- Restart the computer
In most cases, this method will get the sleep mode back in the power menu, so check it. If it doesn’t appear, you will have to edit the sleep settings from the group policy. Here are the steps.
- Open group policy editor
- Go to computer configuration
- Go to the administrative template
- Go to system
- Open Power management
- Open Sleep settings
- Look for “Allow standby by states when sleeping(plugged-in) and open it
- Choose enabled or not figured and apply settings
4. Use the troubleshooter

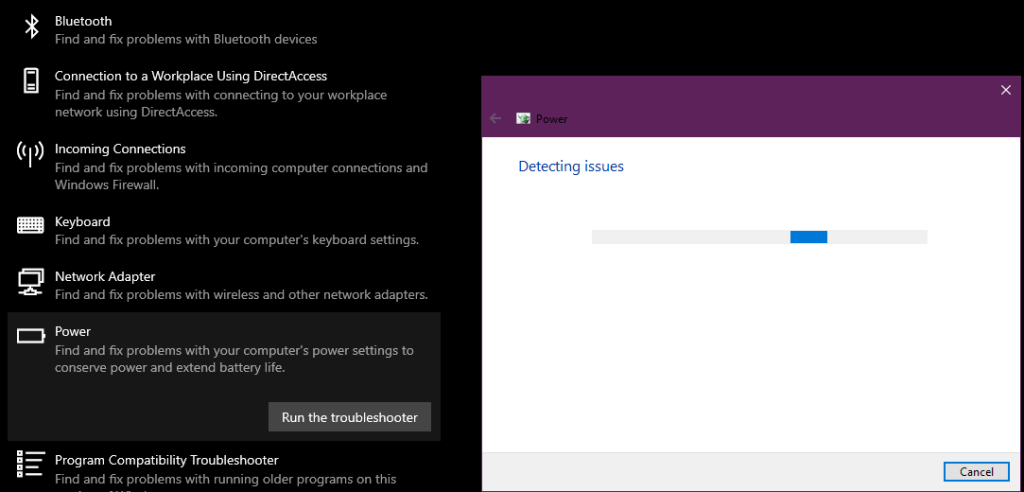
There is a built-in troubleshooter in Windows 10 to help users in dealing with errors in the power menu. You can access this troubleshooter from the Windows settings. Here are the steps to run the power troubleshooter and get the sleep mode back.
- Go to Windows settings
- Click on update and security
- Click on Troubleshoot from the side panel
- Click on Additional Troubleshooters
- Find “Power” and click on it to run the troubleshooter
- Let the process finish and restart the computer
Read More: How to Restore Missing Windows Services?
These built-in troubleshooters work well and can find problems to fix them. If the problem hasn’t gone even after running the troubleshooter, try the next method.
5. Update graphics card drivers
Missing or outdated graphics card drivers can lead to the missing sleep option error. Go to the device manager and check whether the graphics card drivers are outdated to update them. Sometimes, the Windows driver updater doesn’t work well, so the best option is to download the drivers directly from the official website of the manufacturer and manually install them. Third-party driver updaters are available that you can use to bulk update all outdated drivers.
6. Update the operating system
Last but not least, an outdated operating system can also lead to the missing sleep option error. Check the operating system for new updates and install them in the first place. As you know that sleep mode is a component of the operating system, so an outdated operating system can cause this error and many similar errors. To avoid the hassle of manually checking and downloading the operating system updates in the future, you can enable the auto-update option. This will automatically check for new updates and install them to keep everything running.

