You might hear people talking about the limited CPU usage in windows. Why do we all need to limit the utilization of CPU? You can find every answer to your question in this article. It is essential and helpful to create a limit on CPU usage, especially when running a cumbersome game or program. Are you looking for a week to better understand CPU usage?
This article will cover the answers to why we need to limit CPU usage, its importance, and how to set the utilization limit in CPU. After going through all the above categories discussed in this article, you will understand every window tip and trick regarding CPU usage limitations. So, let’s begin and explore the Utilization of CPU.
What is Meant by Limitation Usage of CPU By Any Program?
When you install any intensifying application or software on your PC, it starts to process a significant number of CPU usage. Sometimes, it might take all the usage available in your CPU. In such cases, you need to maintain a limit that will redistrict any program from utilizing a tremendous amount of CPU usage.
Read More: How to Restore Quick Access Toolbar
Importance of Limited CPU Usage
Hopefully, you will get some idea from the introduction of CPU usage and why it is so important. But to better understand and clarify other queries in your mind, we will see in detail why it is important and how useful it can be for your PC.
- By limiting the utilization of the CPU, you can enjoy your processor’s running without interruption or trouble.
- If any program takes 100% CPU usage, it might break down or freeze the processor.
- It helps you to arrange the space for other software on your PC.
- You can prevent your CPU from various errors.
- You can perform multitasking without your system being slowed down.
This is how you can benefit by limiting your CPU’s utilization by any program you think might take 100% usage of the processor during running.
How to Check CPU Usage in Windows 10?
The information regarding CPU abuse is easily accessible to every person in the operating system. There is no requirement for any special skills to check out the percentage of CPU usage by any program. But, by examining the CPU usage, you can quickly Get all the details of programs and software that use a high percentage of CPU to proceed and run on your PC.
Read More: How to Fix Hibernate Problems
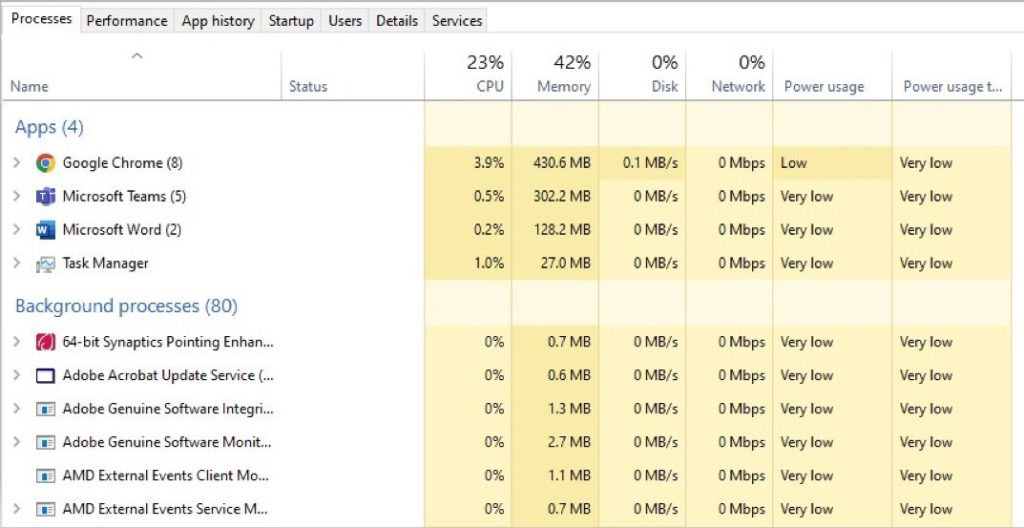
- Go to the search bar and search for “Task Manager.”
- Afterward, you can see the Task Manager as a result of your search, click on “Open,” and wait until the task manager brings the software and application to the screen.
- Click on Process, and here you can check all the programs installed on your PC and how many processors they take to run on a computer. To have a better understanding, examine the picture given below.

What Are the Methods to Limit the Usage OF CPU In Windows 10?
Are you planning to limit the usage of CPU in Windows 10 but need to know how to? Don’t worry! Because in this part of the article, you will get a step-by-step tutorial of different methods that can be very beneficial for making the CPU usage limit.
However, several ways and solutions have additional window tips and tricks. But the following techniques are very effective, easy to perform, and suggested by people on a large scale. Check out the following steps carefully to better understand and explore how much your PC storage is in use.
Set/Un-set Priority Process
Setting and unsetting the program priorities is one of the best and easiest ways to resolve this window problem. In the task manager, you can decide which program should be on the priority list to access CPU usage and which program should have the lowest CPU CPU utilization CPU processing. Check out the following steps to perform and create limited utilization in your PC.
Read More: Windows 10 Randomly Black Screen Errors – 15 Ways to Fix
- First, apply, and search for Task Manager in the window’s search bar.
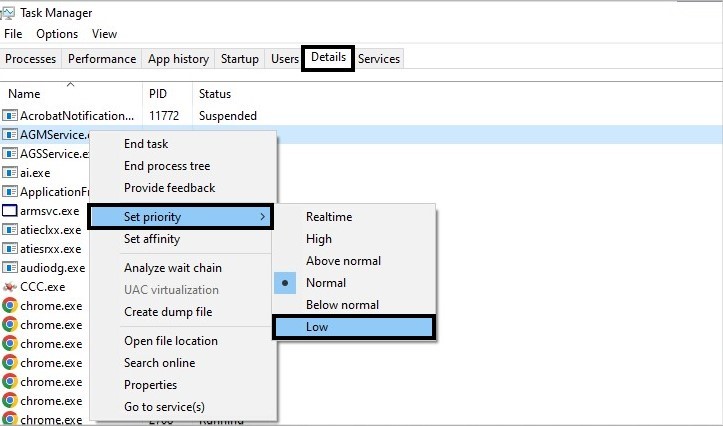
- Open task manager and go to the Details. Here you can see all the programs and their details. In this section, you can see which program occupies most of the CPU usage.
- Left-click on the program that takes a lot of space from the processor.
- Move to Set Priorities>Low. Now you will realize the program begins to use minimum processor storage.

Low The Maximum State of Processor
Lowering the maximum state processor is another effective method that can be used to utilize the CPU. With the help of this method, there will be less task pressure on your processor, and you can prevent your CPU from getting overheated while multitasking. See the following steps to perform this effective method.
- Open the control panel in your window.
- Go to search in the control panel and type the Power option. Search if you can’t find the Power option in the given opportunities in the control panel.
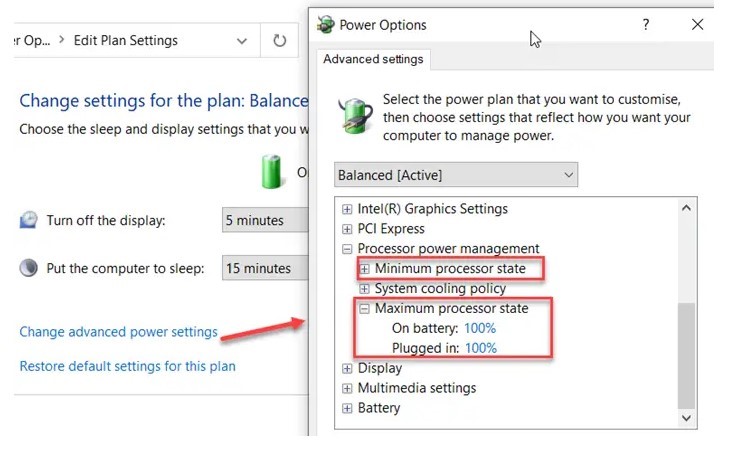
- Press the Changed Plan Settings>Change Advanced Power Settings, and you will get a new power options window.
- Next, find the Processor Power Management option in the window, where you must click on Maximum Processor State. Afterward, edit the values.
- If the value sets to 100% already, you need to change it to 80% (for both; Battery and Plugged In) to run your PC at 80% even during peak loads. At last, click on Apply>Ok and exit the window.

Conclusion
After applying the above two methods, you can preserve the 100% usage of CPU by any program. There are many cases in which people reported a terrible experience when the program consumed 100% CPU usage. It might turn everything down and, yeah, freeze the system’s working. Therefore, it is better to set the utilization rate of the CPU. We hope in this article, you get all the necessary information to help you create limited usage of processors.

