Those who recently upgraded their computer to Windows 11 or reset it may experience the standard hardware security error. The notification of this error appears in the Windows Security app. Mostly, users have experienced this error in the 22H2 Version of Windows 11, but it can also occur on all the other versions of Windows 10 and Windows 11.
If you have also experienced the hardware security error, you are at the right place; here are three easy fixes to this error, along with details about why this error appears. These methods are pretty simple, and you will likely fix the hardware security error in no time.
What is Standard hardware security?
Here are all the standard hardware security requirements that your pc needs to meet, and if it doesn’t, you will get the error.
- TPM 2.0 security processor is available and enabled.
- Data execution prevention is turned on.
- The secure boot is turned on.
- CPU virtualization is turned on.
- UEFI memory attributes table is available.
Read More: Windows 10 Guide: How to fix Network Connection Errors
Why Standard hardware security error occurs?
After learning about all the requirements of standard hardware security, the next step is to learn why this error occurs. Below are some common causes of the hardware error.
- Outdated system drivers.
- Outdated BIOS firmware.
- Corrupted Windows update.
- Bugs and glitches in the operating system.
How to fix the Standard hardware security not supported error?
Before you follow these three methods to fix the security error, it is important to check the abovementioned requirements. If everything is up to the standard, you should go for these methods.
1. Meet Hardware security requirements
The first step of troubleshooting hardware security is to check whether your system meets the minimum requirements. All the hardware security requirements are mentioned above. To check these requirements, go to the Device security section. You can check the secure boot, core isolation, and security processor in this section.
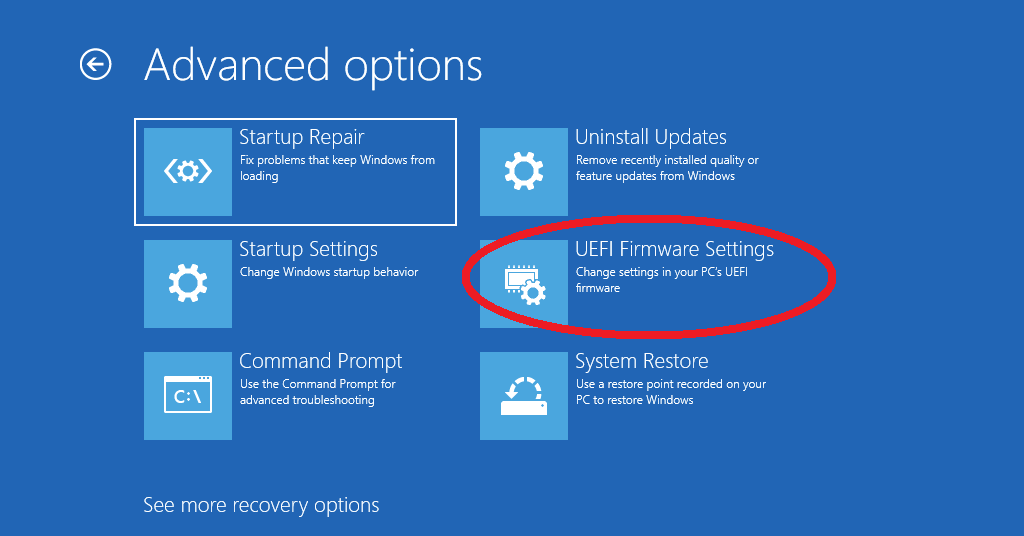
After this, you have to check the UEFI settings. Mostly, those who build their computer face this hardware security issue because most manufacturers install these standards by default. To change the UEFI settings, here are the steps. Not all systems have the same configuration, so you can Google for more information if your settings differ.

- Go to System.
- Click on Recovery.
- Find “Advanced Startup” and Click on Restart now next to it.
- Go to the Recovery menu during the restart.
- Click on Troubleshoot.
- Go to Advanced options.
- Click on UEFI Firmware Settings.
- Restart the computer.
Read More: What is Wsappx and How to Fix Its High CPU Usage?
Once the computer restarts, the UEFI settings will be launched, and you have to follow these steps.
- Choose the Expert Mode.
- Go to CPU settings.
- Enable the Virtualization technology.
- Go to System Agent Configuration.
- Enable the Memory integrity feature.
- Enable platform trust technology.
- Go to the secure boot section.
- Install default secure boot keys.
- Enable secure boot by selecting Window UEFI mode.
- Save all settings by pressing the “F10” key.
2. Uninstall Windows Update

Although Microsoft claims that they extensively test every new version of Windows before releasing, it can still contain errors and bugs. These bugs can sometimes lead to stability issues. Take the example of the 22H2 version of Windows 11, which had a bug due to which users around the globe faced the standard hardware security error. This is why uninstalling updates can solve many issues. To uninstall the recently installed operating system updates, follow these steps.
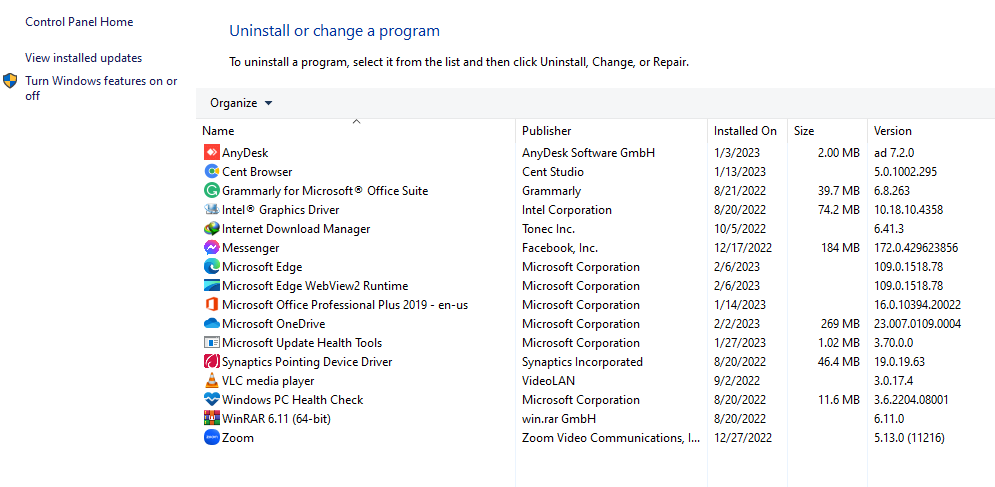
- Go to the Control panel.
- Click on “Uninstall a program” under “Programs.”
- Locate the recently installed version of Windows and right-click on it.
- Click “Uninstall” and wait for the process to finish.
Read More: 10 Ways to Fix if Your PC Won’t Turn On
3. Clean and Install the Operating system
Sometimes, the installation of Windows can cause these issues as well, so clean installing the operating system becomes crucial. For this method, you will have to download the official ISO files of the desired operating system from Microsoft’s official website and install them. This process is time-consuming, and you will need some skills to install the operating system with this method, but it’s worth the effort.

