
When you go to the task manager in Windows 11 and check the resources, you will notice that some apps are running in the background. These apps are using resources, so the first thing that you want to do is to disable them. Most of these apps are unnecessary, so the computer doesn’t need them. In Windows 11, you can disable these apps through various methods discussed in this article. You can also disable these apps to ensure you get the best performance out of your computer.
Guide to Disable Background Apps
Disabling background apps aren’t required for those with a high-end computer. You may want to disable all the apps in the list, which you should avoid. Check each description and search the internet for more information before disabling an app. Disabling the wrong app can result in data loss and errors. Apps related to the operating system should be kept running at all costs.
1. From Windows 11 Settings
This method works by disabling one background app at a time. You must access the Windows settings menu and follow these steps to disable the desired app.
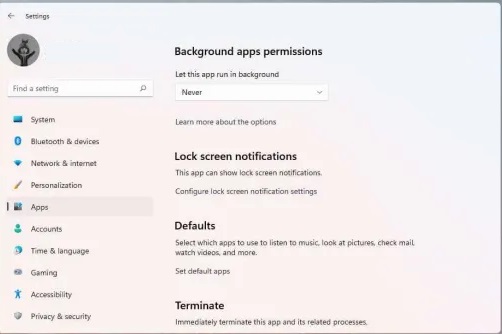
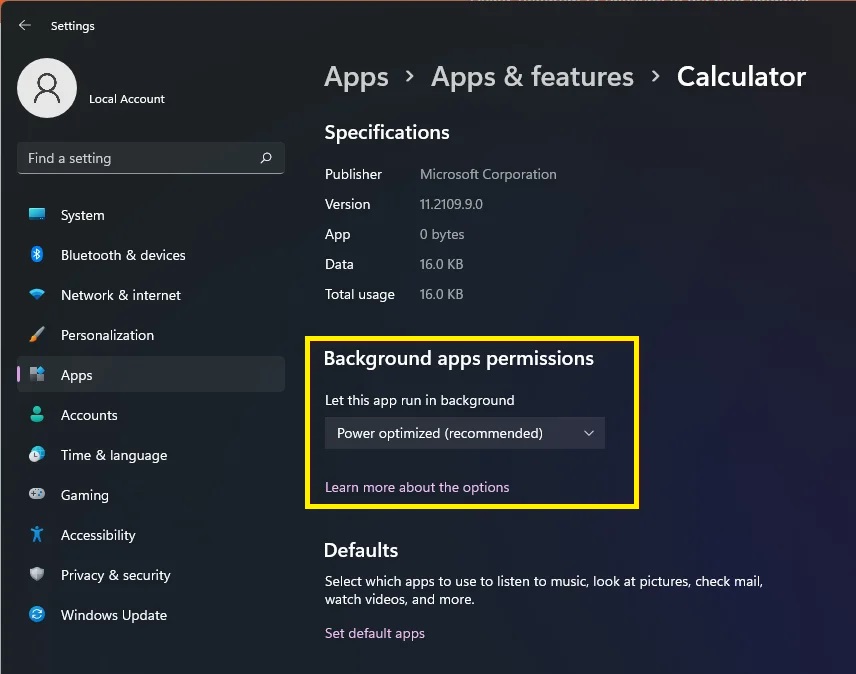
- Go to Settings.
- Click on Apps from the Side panel.
- Click on Apps & features.
- Find the application and tap on the three dots.
- Click on advanced options from the following menu.
- Find background app permissions.
- Choose the desired option and apply the settings.
Read More: Best Windows File Explorer Alternatives
Once you follow these steps, the app will never work in the background. You have to repeat these steps to disable all the background apps. If this method is time-consuming for you, the next step is available.
2. From Battery Settings
This method works on laptops only as they are powered by batteries and thus feature battery settings. Here are the steps to disable background apps from the battery settings.
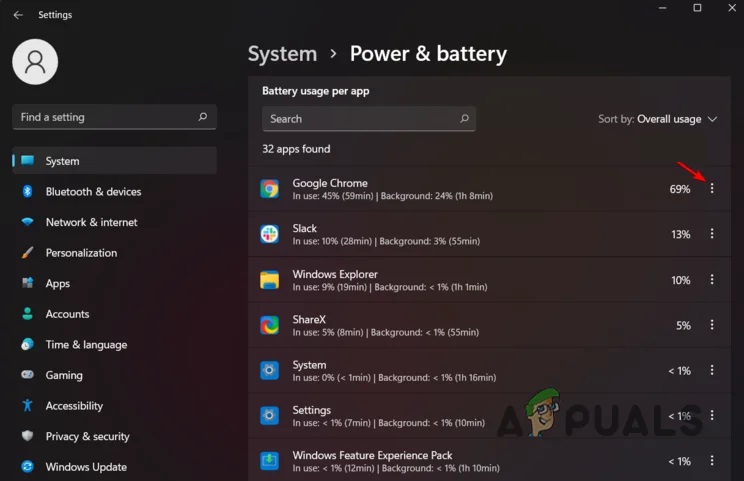
- Search for “Power & Battery options” from the start menu and open it.
- Click on the Battery usage option from the bottom.
Here you will see the percentage of battery used by all the available apps. If you want to extend the laptop’s battery life and enhance its performance, disable apps that are taking a toll on your computer’s battery.
- Select the desired app.
- Click on Manage background activity.
This will again take you to the background apps permissions menu, just like the previous menu. From this section, choose the Never option to disable any background app you want.
3. Using Group Policy Editor
This will surprise many users, but they can disable any background app they want from the group policy editor in Windows 11. Here are the steps to disable any background app.
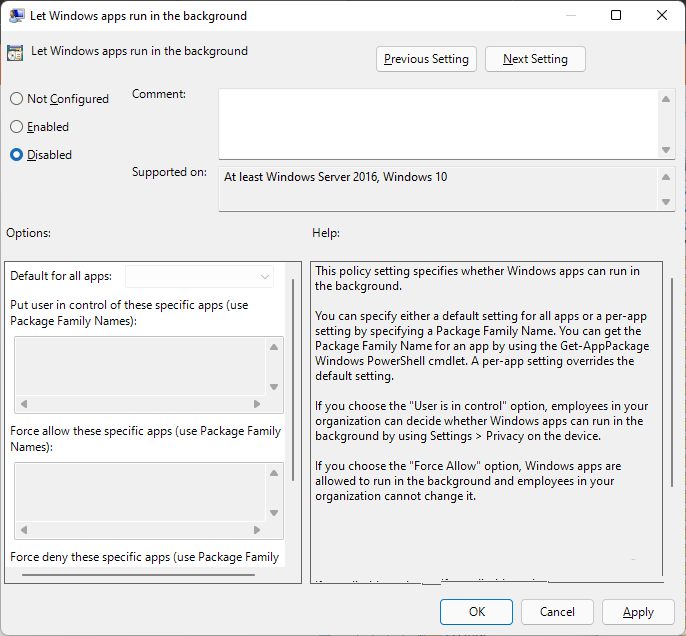
- Type “gpedit.msc” in Run box.
- Click on Computer Configuration.
- Click on administrative templates.
- Click on Windows Components.
- Click on App Privacy.
- Find “Let Windows apps run in the background” from the list of policies.
- Double-click on the selected policy.
- Disable this policy.
- Apply new settings and restart the computer.
Read More: Here are the Best Tips and Tricks to try in Windows 10
4. Using Windows registry
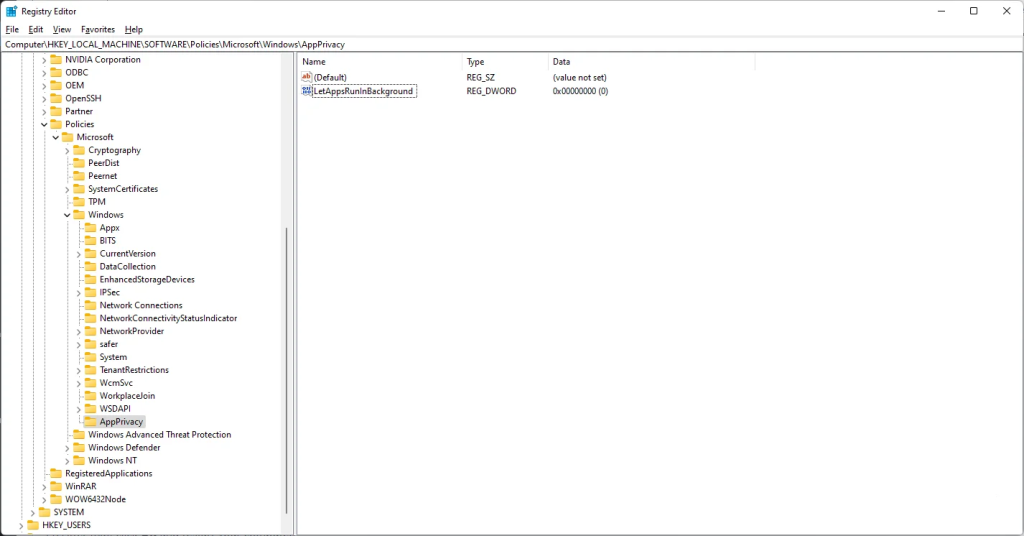
If you’re a geek, this method to disable background apps is for you. This requires you to go to the Windows registry and create a new registry for disabling these apps. Beware of tweaking any registries in the Windows registry, as this can cause bugs. Create a backup of all the available registries before proceeding with this method. Follow these guidelines to create a new registry.
- Open registry editor
- Copy “HKEY_LOCAL_MACHINE\SOFTWARE\Policies\Microsoft\Windows\AppPrivacy” and paste it into the windows registry editor
Sometimes, the App privacy registry isn’t available, but don’t worry; you can always create one.
- Create a new folder and name it “AppPrivacy.”
- Create a new DWORD (32-bit) Value registry.
- Name it “LetAppsRunInBackground.”
- Open the new registry.
- Set the value to two and apply.
- Restart the computer.