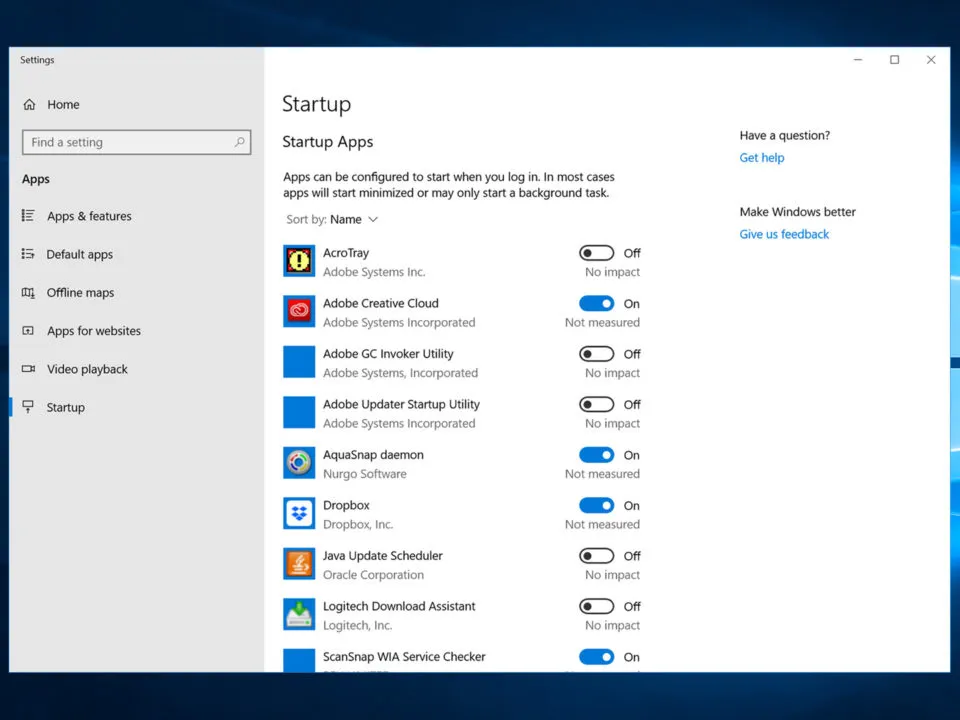
Some programs will automatically run in the background when you start, which are called startup programs. Most of these apps are necessary, but sometimes, unnecessary programs can also start, which you don’t want to happen at all.
This offer features a lot of conveniences, but they can take a toll on the power. If this is the case with you, you will surely want to turn off these startup programs which won’t be a problem for experts, but beginners have to search for ways to disable these programs.
1. Use the Task Manager

The Task Manager in Windows 11 features many settings you need to run your computer perfectly. This section is for those who know about computers, but sometimes, you need to use them to get things done.
The primary purpose of a task manager is to show all the running programs and help users track their computers’ performance. You can also use the task manager in Windows 10 to disable any startup program you want. To do this, here are the steps that you need to follow.
Read More: Windows 10 Randomly Black Screen Errors – 15 Ways to Fix
- Use the shortcut key “CTRL + SHIFT + ESC” to access the task manager
- Click on “Startup Apps” from the top
Here you will see the list of all the available apps starting when you start the computer. Right next to each app, you can also see the status of each app, whether it is disabled or enabled.
- Right-click on the desired app to open the menu
- Click on “Disable” on the top
When you start the computer next time, this program won’t launch. You can disable or enable any program you want in the same way.
2. From Settings Menu

The second option to disable any startup program you want is from the Settings menu. It is like the control panel; you can do everything you can through the control and much more. Here are the steps to turn off these apps from the settings menu.
Read More: 8 Best Malware Removal Tools for Windows 10/11 in 2023
- Open the Settings menu with “Windows Key + I.”
- Go to the “Apps” section from the second row
- Click on Startup from the side panel
3. Use System Configuration

Sometimes, even after you disable apps from the startup apps list, they are still running in the background, making your computer slow. In this case, you will have to disable these programs from the system configuration.
The system configuration method is recommended to those who have some knowledge about computers because this can lead to a corrupt operating system in some cases. For this method, you will have to turn off startup services.
- Open the Run menu by using “Windows key + R.”
- Enter “msconfig” and press OK.
- Go to the services tab in the System configuration menu
- Find the check box at the bottom of the page that states “Hide all Microsoft Services” and check it
- Click to disable all the services or disable the desired service only by going through the list
- Click Apply and Ok
- Restart the PC to apply the settings
4. Use App-Settings
Almost all the above-mentioned methods are pretty fast, and you can disable any program you want in a few simple steps, but sometimes, these methods don’t work. In such cases, you have to disable the startup option from the software’s settings manually.
This method will ensure that the app won’t start again unless you open it. Again, you have to restart the computer after you disable a program from the settings to take effect.
Read More: What are Motherboard Beep Codes? Explained!
5. Use the Startup Folder

When you install an app, most of the time, it will automatically register itself in the startup menu. Still, some apps also register themselves by placing an icon in the startup folder. In such cases, you have to remove these icons to disable the startup settings for these apps to stop them from automatically starting at the boot time. Here is the guide to open the startup folder and remove any icons you want.
- Open the Run menu by pressing the “Windows key + R” at the same time
- Enter “shell: startup” in the search bar and press OK to search
- In the startup folder, delete all the unfamiliar programs and close the folder.

