You can add multiple users to Windows 10, and this is a good feature, especially for those who have to share their computers with colleagues or family members. If this feature wasn’t available, they would have to provide access to their user account, which means anyone using the computer can access their private stuff. By creating a separate account, you can ensure data safety. Creating a new user account means everything from a separate desktop layout to a start menu and private data folders that only the admin can access.
For kids, parents can create a child account to restrict access to apps and websites. You can also get a complete activity report of the child’s account. If you are new to Windows 10, here is a complete guide to creating new adult and child accounts with different access levels. The article also features the benefits of the child account.
Benefits of Child Account
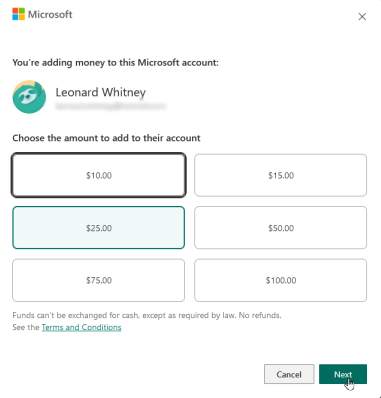
After creating a child account, add money so your kids can purchase their favorite games from the Xbox store without a credit card. You will get notifications through email about how much they have spent and what they have bought. Not every game, video, movie, or tv show on the internet is made for kids, and some can harm them.
Read More: Windows 10 Guide: How to fix 0xc1900104 Update Error?
To avoid such cases, the set age limit for your kids, and they can only watch games, shows, and movies if they meet the requirements. With the scheduling function of the child account, you can take control of how long your kids can use the device, and after the timer ends, the computer will lock automatically.
How to add accounts to Windows 10?
To add your family members’ accounts, login using your Microsoft account first. You don’t have to log in to add other users’ accounts. To add accounts through Windows settings, follow these steps.
- Go to Windows Settings
- Click on Accounts
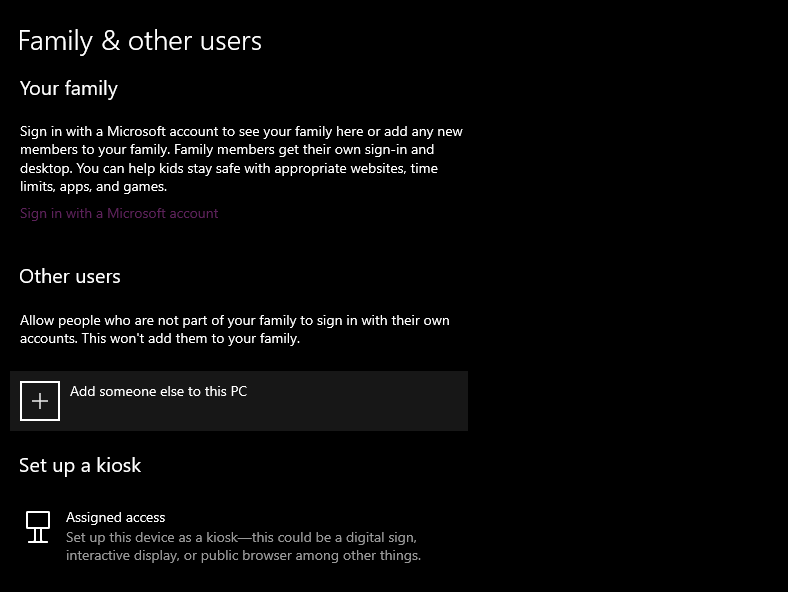
- Click on “Family & other users” from the side panel
Now, you have the option to add the account of a family member to the account of your coworker. After choosing the desired option, enter the email of the person.
How to add an adult account?

After entering the email, proceed to the next screen, where you must choose the role of the new account. Create an adult or child account, depending on the access you want to give them. For an adult account, choose the organizer option. After choosing their role, just send them the invite.
To use the computer, they don’t have to accept the email invitation, but those who want to manage and change the family settings must click the invitation in the email. To change the administrator access of the new user, click on their profile. Administrator and standard user options are available.
How to add a child account?
Choose the member option from the account creation screen to add a child account. All the remaining steps are the same as creating an adult account. If you have already created a Microsoft account for your, simply enter their email and accept the invitation from the email address.
How to create a child account?
Here is the complete guide to creating a new child account in Windows 10.
- Choose “Create an account for a child.”
- Enter the email address with @Hotmail or Outlook domain.
- Enter the password for the Microsoft account.
- On the next screen, add the first and last name of the child.
- Enter the date of birth of the child.
- Enter your Microsoft account details.
Read More: What is Wsappx and How to Fix Its High CPU Usage?
Enter your child’s correct date of birth, as entering the incorrect date of birth will cause problems when you try to set an age limit for the content. If the age increases, they will watch stuff they shouldn’t. You can also enable your kids to download apps from other sources. You can change the age limit, search filter, purchase, and activity settings from the Family Safety menu.
How to monitor Child account activity?

Now that you have successfully added the child account, it is time to learn how you can view and manage your child’s activity. For this purpose, you must go to your Microsoft account’s Family Safety page. Here you will see all the available family accounts. Click on the child account that you want to manage.

There is an overview page with details about your kids’ age limit and screen time. To limit their screen time, click on Turn Limits. Select dates and times and click done to set this limit. You will have to set limits manually for all days. From the side panel, click on content filters.

You can add sites to a block list to prevent your kids from seeing them and create a list of allowed sites, and your kids can only access those sites. If a website’s category is educational, you can enable the option to let your kids access them even with restrictions.
Keep an eye on what and how your kids spend their money by accessing the spending section from the side panel. You can easily add money to their account through this menu. You must first enable their activity from their Microsoft account to track it. In Windows 10, you can view a weekly report about your kid’s activity on your computer.
How to add an account Online?

There is a second option to add accounts in Windows 10, and you can do so by going to the official website of Microsoft and logging in to your account there. After logging in, go to the family section and tap on the link to view all your family. Click on the Add button to add a family member’s account here.
The remaining process is the same as choosing the role of a new member from the organizer and member options. The Organizer account is for adults, while the member account is for the child. Sometimes, a new version will be blocked from signing in, and you must manually allow it.

