In Windows 10, taking a screenshot is pretty normal whether you’re an expert or a beginner, but using third-party software to accomplish this simple task sounds very odd. So, Microsoft features various shortcut keys and methods to enable users to take screenshots. From the looks of it, taking a screenshot is a simple task, but Windows 10 features many different options.
Although screenshot-like features have been available in the Windows operating system for quite some time now, Windows 10 took things to a new level. Now, you can take a screenshot by pressing a combination of buttons or using an advanced snipping tool according to your needs. For new Windows 10 users, here are six ways to take screenshots in Windows 10 that they should try and adapt.
1. Snipping Tool

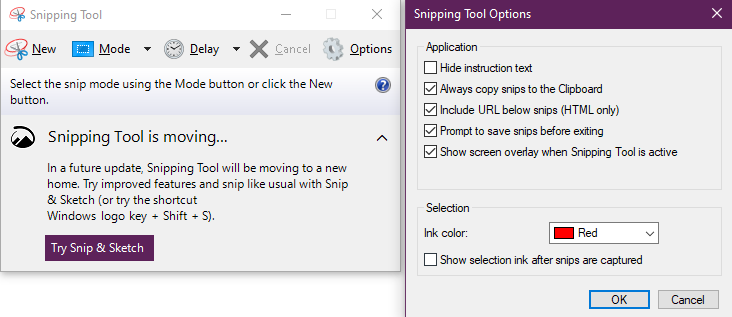
The snipping tool was first released in Windows Vista and has been the first choice of users when they want to take a screenshot. A few years back, Microsoft told users that the snipping tool would be removed, but it is still available in Windows 11. Here are the steps to access the snipping tool and take a screenshot.
- Go to start menu
- Type the Snipping tool and click on the first search result
- On the Snipping tool interface, click on New to take a screenshot

The snipping tool is very advanced and features various snipping options, such as full-screen, free-form screenshots, rectangular screenshots, and window snips. You will have to manually save all your snips before exiting the snipping tool, or they will be gone forever. From the options menu, you can change the ink color of the selection.
2. Snip and Sketch Shortcut key

The snip and sketch shortcut key is the most popular shortcut when taking a screenshot. To take a screenshot, you will have to press the Windows key, SHIFT, and S key at the same time. This will provide you with a screenshot bar at the top of the screen. Like the snipping tool, there are four options to take a rectangular screenshot, a free-form screenshot, a window screenshot, or a full screenshot.
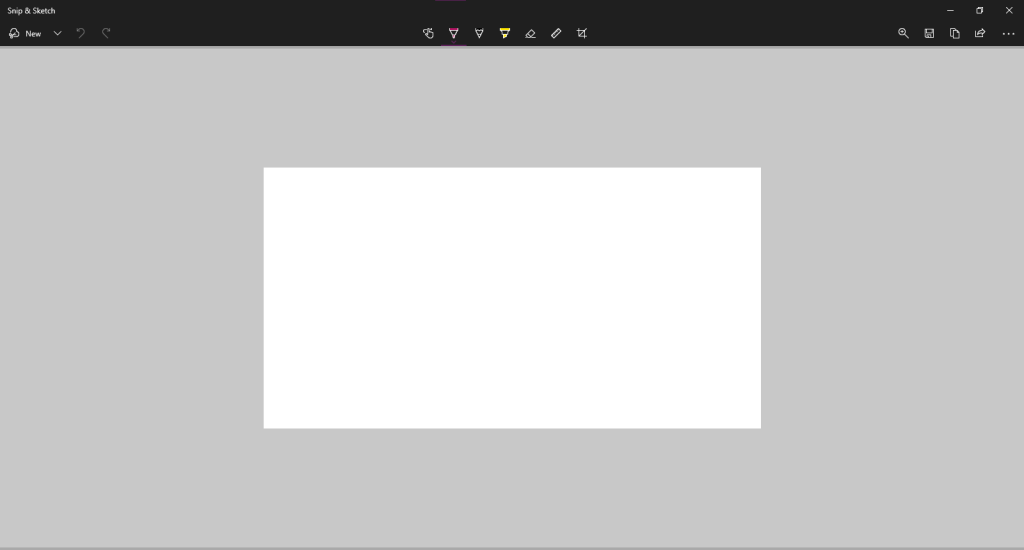
You can also access the snip and sketch menu from the action center, but the shortcut key is the better option. After you finalize the screenshot, you can go to the sketch menu to edit the screenshot, copy it, and save it in the desired folder. The editing options in the sketching tool are touch writing, ruler, cropping, highlighter, pencil, pen, etc.
You can create a new shortcut key for the snip and sketch tool from the Windows settings. Follow these steps.
- Go to Windows Settings
- Click on Ease of Access
- Click on the keyboard from the side panel
- Find the Print Screen shortcut and enable it
- Restart the computer
3. Print Screen with the Clipboard

A clipboard with a print screen is the classic way to take screenshots in Windows 10. Sometimes, when you take a screenshot, the appearance of an app changes, so the clipboard method will save the day. When you hit the print screen key from the keyboard, the system will copy the entire screen and paste it to the clipboard from where you can save it. You can press Alt and print screen together to screenshot a window. Saving any screenshots that you have captured with this method will take some effort.
4. One Drive and print screen key

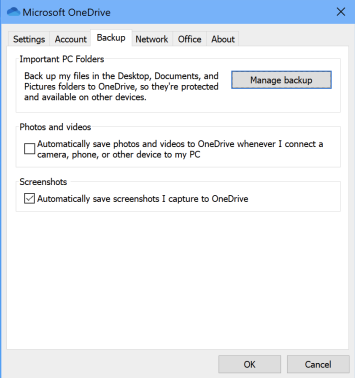
This screenshot method was first added to the Windows operating system in 2015, enabling users to take a full-screen screenshot at a time. Most of the method of taking screenshot remains the same; you have to press the print screen key or Alt and print screen keys, but saving screenshots is way easier now. If you have One Drive, you must turn on this feature, and all your screenshots will be automatically saved to One Drive.
Earlier, users had to copy the image from the clipboard and then use a third-party app to save it. To enable this One Drive feature, follow these steps.
- Go to OneDrive properties
- Click on Backup
- Go to the bottom and check the Screenshots box
5. Xbox Game Bar
Xbox game bar is for gamers, but normal users can also use it for their benefit in Windows 10. The game bar features a button through which you can take screenshots. To open the game bar, press the Windows key and G key. To take a screenshot through the game bar, follow these steps.
- Tap on the Camera icon in the game bar
- This will open a separate screen recording panel
- Use the Windows key + ALT + Print Screen shortcut or press the camera icon to take a screenshot.
Screenshots you take with the game bar are saved in the Pictures folder.
6. Use a Third-party Tool
If you want to take more than simple screenshots, third-party apps are the best option. Many third-party screenshot apps are available on the internet, enabling you to capture high-quality screenshots and edit them according to your needs. Although these apps aren’t for those who take too many screenshots because taking a screenshot with these apps will save some time, it’s worth the effort in terms of quality and other options. Some of the best third-party apps to take screenshots in Windows 10 are given below.
- ShareX
- PicPick
- ScreenPresso
- Snagit
- Apowersoft Screen Capture Pro
- Droplr
- CloudApp

